Mode 0
| BG Layers Available | |||
|---|---|---|---|
| Layer 4 | Layer 3 | Layer 2 | Layer 1 |
| 2bpp | 2bpp | 2bpp | 2bpp |
What is Mode 0?
Mode 0 is the first background mode on the SNES, characterized by its offer of four layers, as opposed to the normal three Mode 1 offers you. However, there are two significant drawbacks: you only have four colors (3 actual colors plus transparency) per palette, and the layer 3 tilemap is halved to make room for layer 4. However, the latter drawback can be circumvented by sacrificing GFX slots. [citation needed]
Thankfully, the first drawback does not apply on the sprite layer, so you can freely use all 16 colors for each sprite palette!
Mode 0 supports mosaic, windowing, and interlacing.
Applications of Mode 0
When it comes to the SNES library of games, only a few have used Layer 4, such as Super Mario Kart, Super Mario World 2 - Yoshi's Island, S.O.S., and Earthbound.
More interestingly, in the field of Super Mario World hacking, a few hacks and contest levels have used it, such as ASMWCP, LMPuny's work-in-progress SUPER MARIO BROS. Returns, idol and Katrina's Chocolate Level Design Contest 2018 entry lightest, and AnasMario130's Power Mario Contest entry Pyro-Blue's Fort.
Palette and Tilemap Distribution
As mentioned in the previous heading, Mode 0 can only offer you four colors per palette, including transparency. Each layer takes up 8 four-color palettes distributed in two rows each. Layer 1 takes up rows 0-1, layer 2 rows 2-3, layer 3 rows 4-5, and layer 4 rows 6-7.
As for the tilemap, it is 2bpp, but the size must be 4 KB. However, the arrangement for the tilemap is doubled, meaning that in a graphics editor like YY-CHR, you can have eight rows' worth of graphics instead of the usual four.
In Super Mario World, the tilemap distribution is different-- FG1 occupies tiles 0-FF, FG2 occupies tiles 100-1FF, BG1 occupies tiles 200-2FF, and FG3 occupies tiles 300-3FF.
How to Use Mode 0 in Super Mario World
IMPORTANT NOTE: It is recommended to use a sprite status bar such as the DKCR-styled status bar or remove the vanilla one globally or on a per-level basis as the vanilla one's IRQ will make tiles around that area look horribly glitched!
IMPORTANT NOTE 2: To avoid getting layer 3 from getting cut off, make sure that the BG's destination is set to 'Start of Layer 3' ('Layer 3 ExGFX/Tilemap Bypass' dialog/Destination for File')
1. First of all, please use one of the given codes in a level using UberASM Tool before proceeding:
Stationary Layer 4, by LMPuny
init:
LDA #$51 : STA $2109
LDA #$59 : STA $210A
LDA #$44 : STA $210C
STZ $3E

LDA #$11 : STA $212C : STA $212E
LDA #$0E : STA $212D : STA $212F
RTL
Automatically-Scrolling Layer 4, by LMPuny
!FreeRAM = $60 ; change this if another resource already uses it

init:
LDA #$51 : STA $2109
LDA #$59 : STA $210A
LDA #$44 : STA $210C
STZ $3E

LDA #$11 : STA $212C : STA $212E
LDA #$0E : STA $212D : STA $212F
RTL

main:
LDA $9D
ORA $13D4|!addr
BNE return
REP #$20
INC !FreeRAM
LDA !FreeRAM
SEP #$20
STA $2113 : XBA : STA $2113
return: RTL
Relative Camera-Based Scrolling Layer 4, by LMPuny; scrolling code by MolSno from his Layer 4 code; however the 'init:' code is broken in that layer 4 doesn't show up at all
!XScroll = #0 ; how much layer 4 scrolls HORIZONTALLY relative to layer 3. This is an exponential DECIMAL value, so a value of 0 ;will make it scroll at the same rate as L3, 2 = twice as slow, 4 = one-fourth as slow, etc.

!YScroll = #0 ; how much layer 4 scrolls VERTICALLY relative to layer 3. This is an exponential DECIMAL value, so a value of 0 ;will make it scroll at the same rate as L3, 2 = twice as slow, 4 = one-fourth as slow, etc.

init:
LDA #$51 : STA $2109
LDA #$59 : STA $210A
LDA #$44 : STA $210C
STZ $3E

LDA #$11 : STA $212C : STA $212E
LDA #$0E : STA $212D : STA $212F

main:
; Layer 4 H-Scroll
REP #$20 : LDA $22
LSR !XScroll
SEP #$20
STA $2113 : XBA : STA $2113

; Layer 4 V-Scroll
REP #$20 : LDA $24
LSR !YScroll
SEP #$20
STA $2114 : XBA : STA $2114
RTL
Bugs so far:
- Layer 2 translucency doesn't work when set in LM. It must be done manually with this code under the init: label without an RTL at the end (the code for layer 3 is still unknown for now):
LDA #$22 ; translucency for layer 2
STA $40
REP #$20
LDA #%0001110100000010
STA $212C
STA $212E
SEP #$20
2. Press Ctrl+F7 on a level to change Lunar Magic's graphics viewer mode to 2bpp.
3. Use the following 2bpp-trimmed SMW tileset for your Layer 4 levels by AnasMario130 (includes most of SMW's important animations and graphics, such as the cave tileset, coins, question blocks, etc.):
First Tileset: Cave
https://cdn.discordapp.com/attachments/334352091340472340/648173302530965504/template.zip
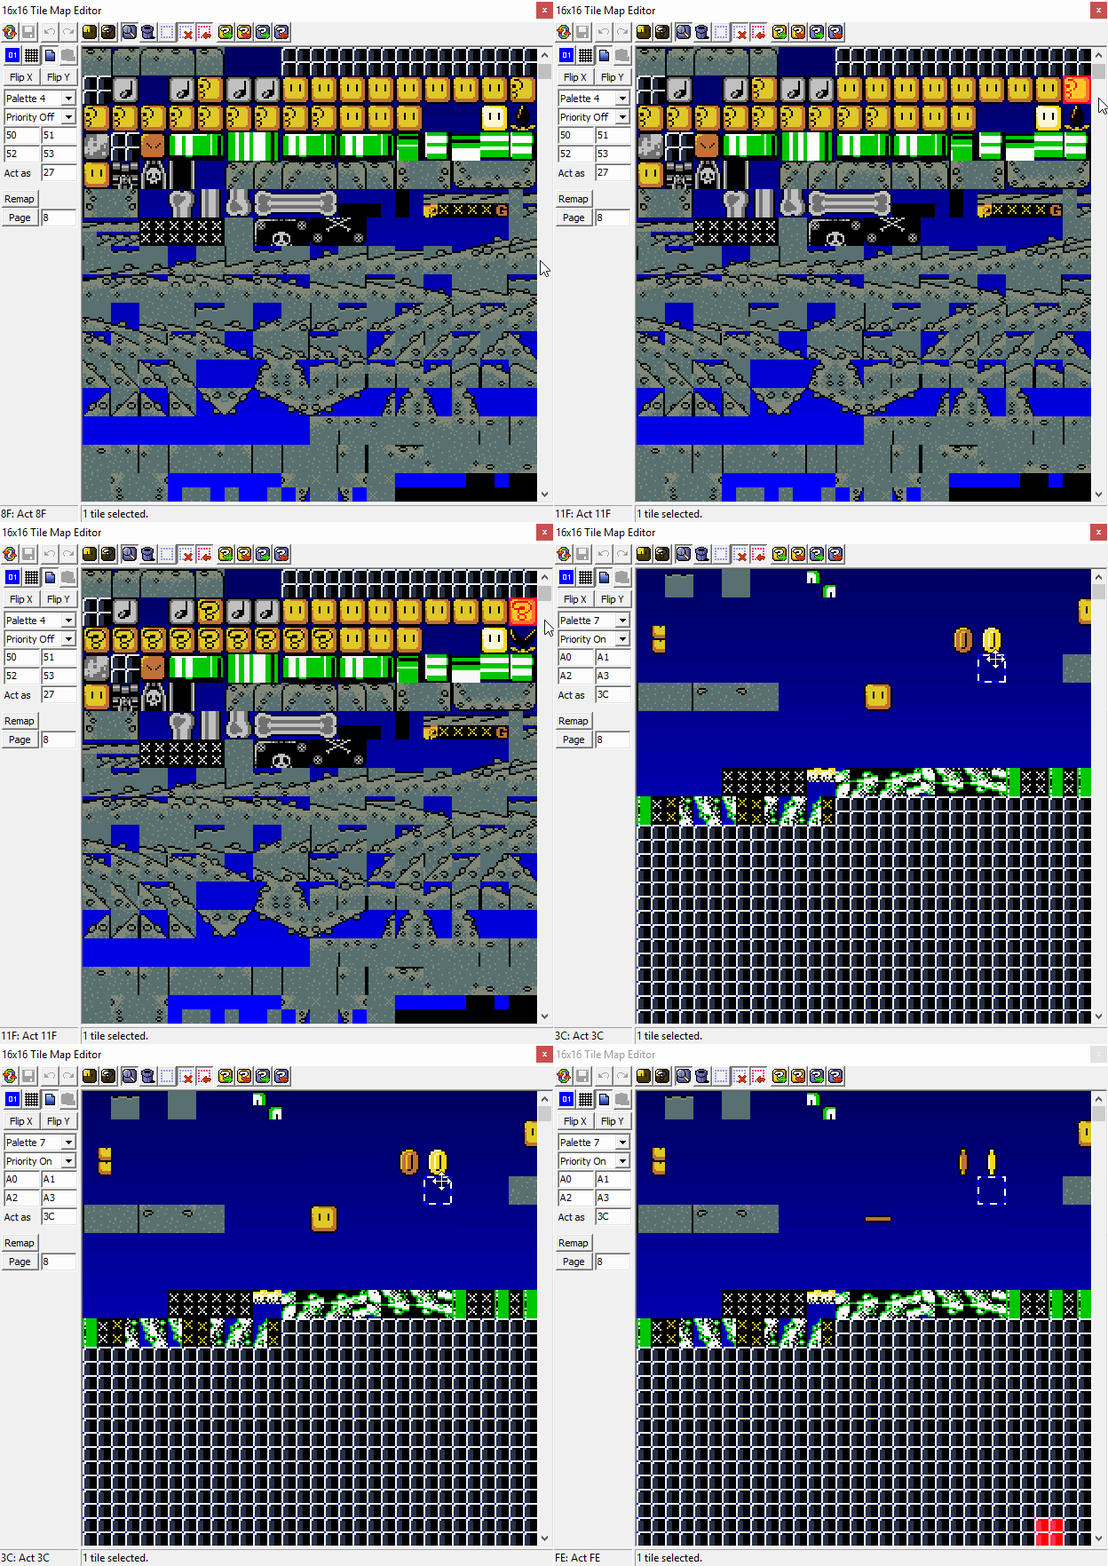 A GIF of the cave tileset as well as the animations
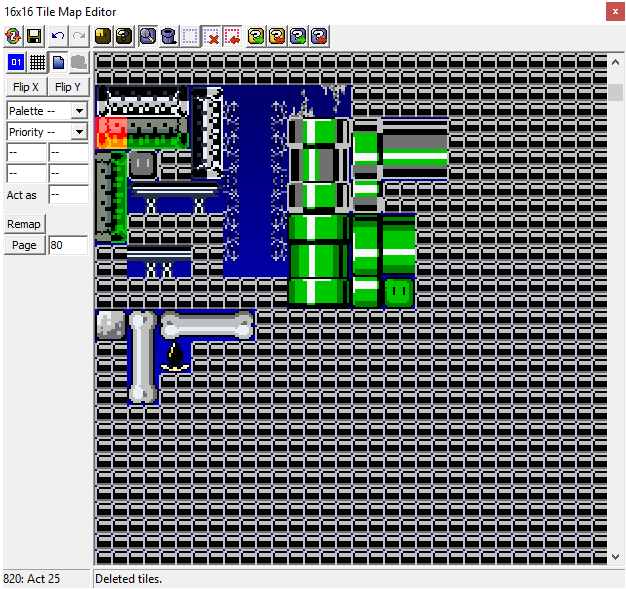 A picture of the map16 data included in 'template.zip'. Discolored tiles are from the ghost ship tileset
Second Tileset: Ghost Ship
Link: https://cdn.discordapp.com/attachments/334352091340472340/886263385266749481/ghostship.zip
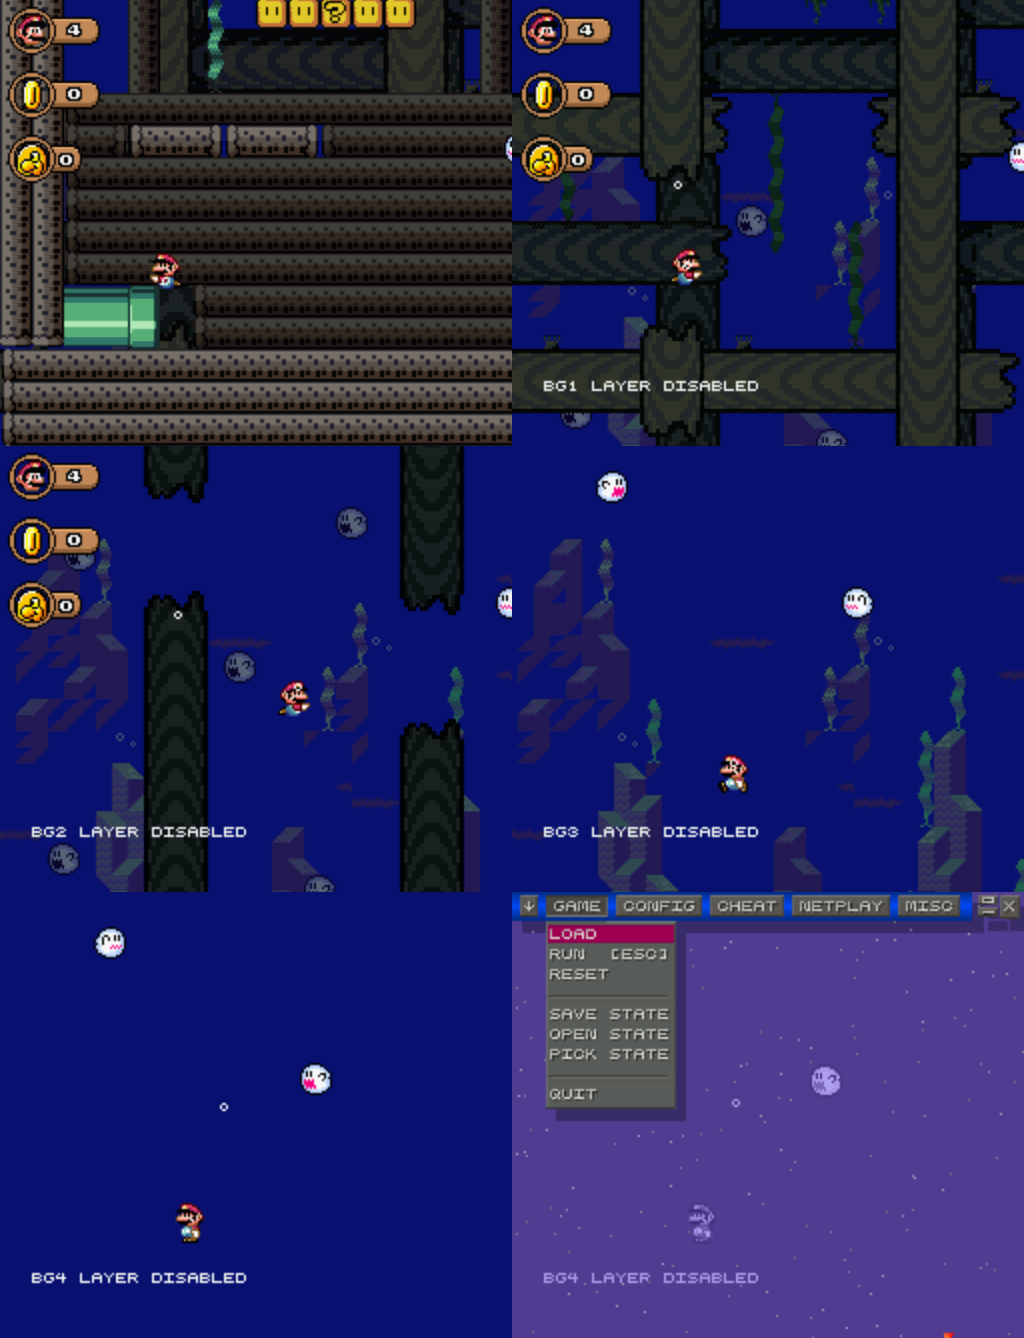 A GIF of the tileset in action with all layers being shown individually later on in the GIF; recorded with LiceCAP on ZMZ
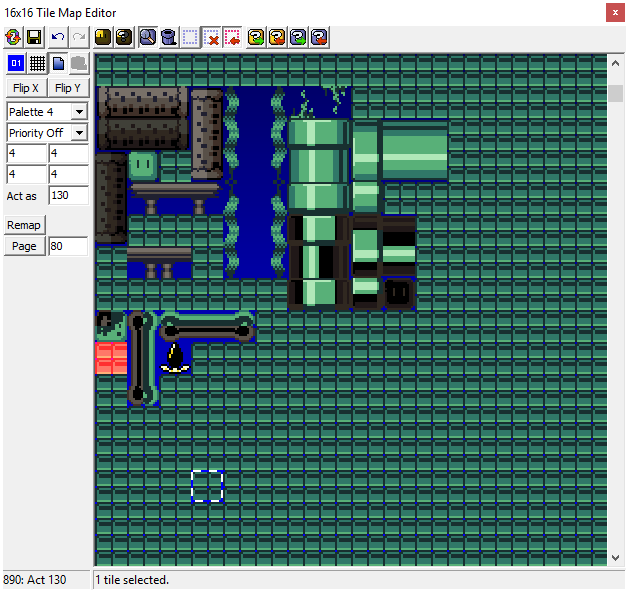 The map16 of the ghost ship tileset, now with the correct palette!
ExAnimation in Mode 0 levels
ExAnimation in Mode 0 levels is not really difficult once you adapt to it, but it may seem tricky at first glance. The main reason for this is that even in LM's 2bpp graphics viewing mode, ExAnimation tiles are still rendered in 4bpp, thus becoming garbled. Also the size of the frames to be animated is condensed into 8x8 tiles according to the following arrangement:
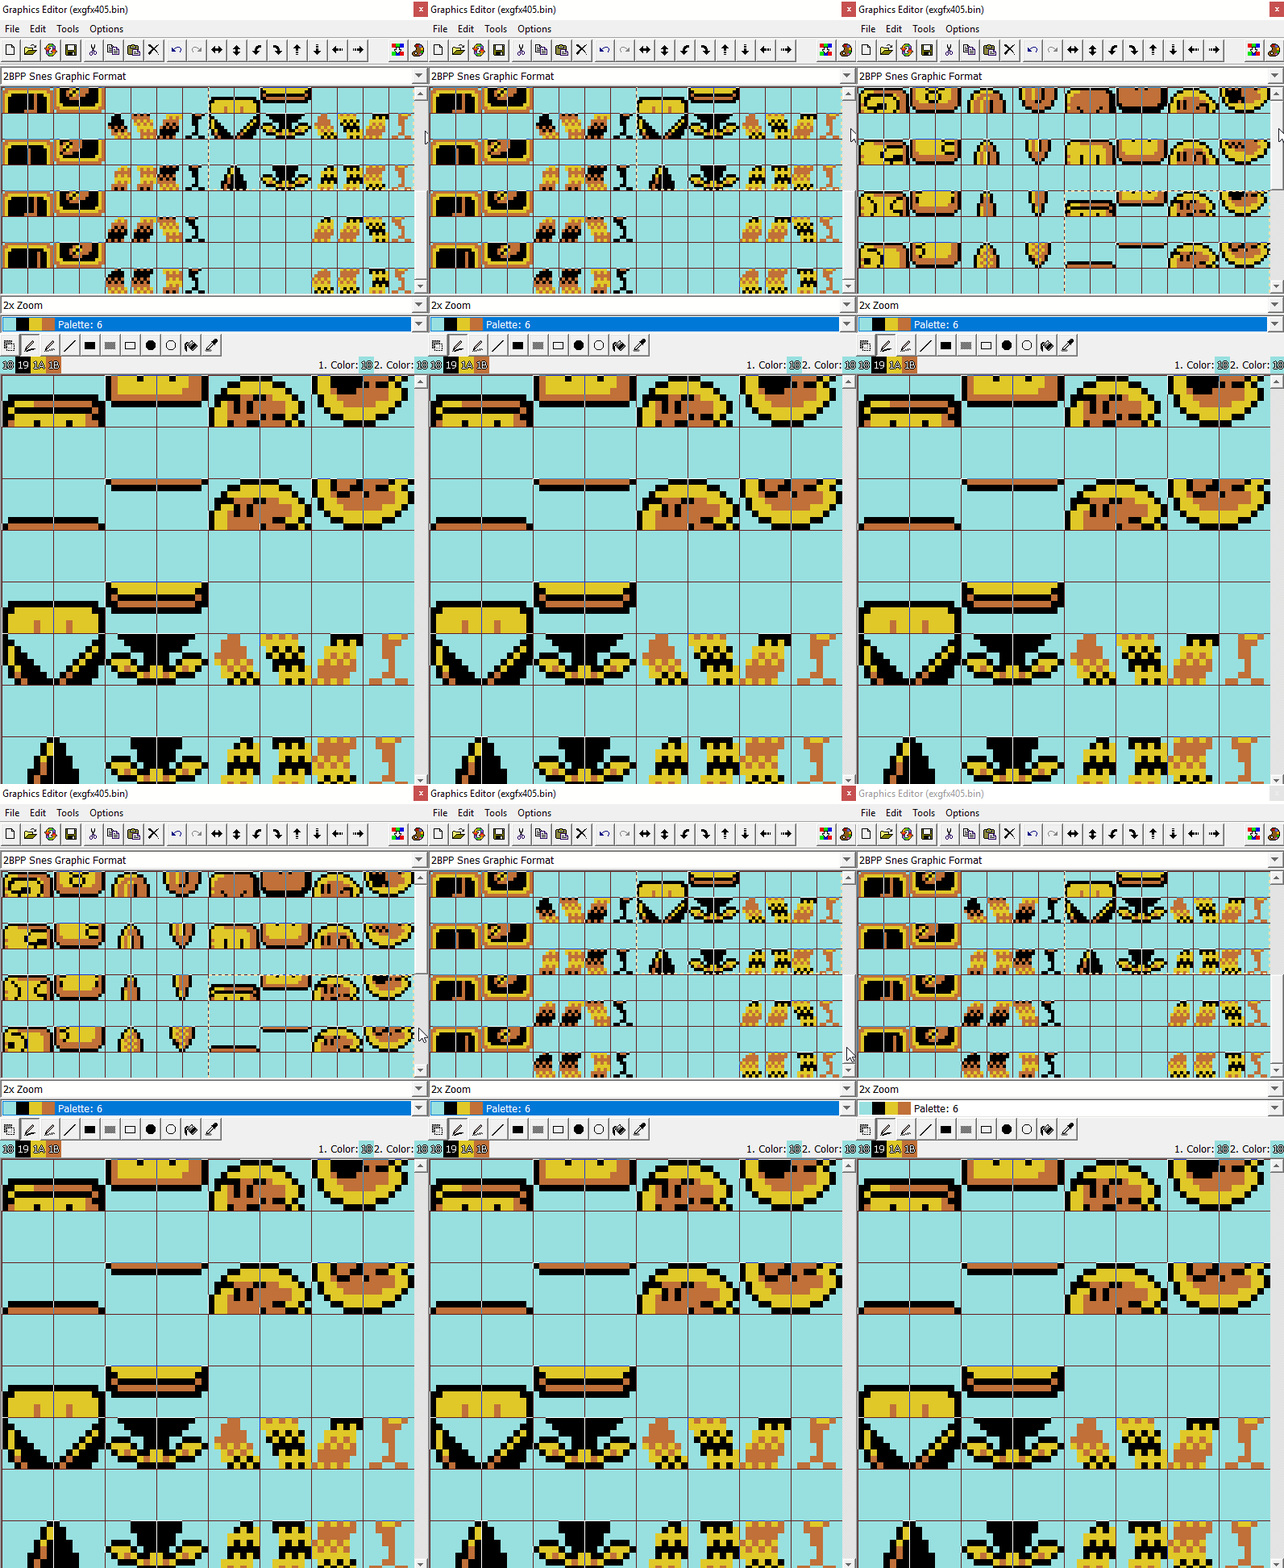 The recommended arrangement of ExAnimation frames for a better understanding of Mode 0 ExAnimation, in ExGFX405
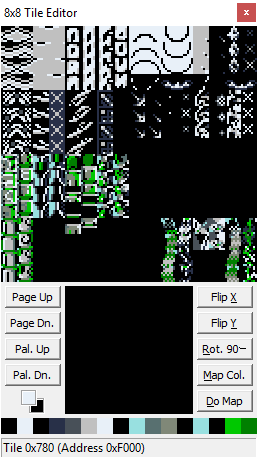 The actual rendering of the tiles, starting from 0x780 to 0x7FF, in the 8x8 Tile Editor window. As explained earlier, the gaps from the above screenshot of ExGFX405 are gone
ExAnimation Tile Explanation
780-781, 790-791, 7A0-7A1, 7B0-7B1: ?-block
782-783, 792-793, 7A2-7A3, 7B2-7B3: Coin
784-785: Used brown block
794-795, 7A4-7A5, 7B4-7B5, 7C4-7C5: Turning turnblock
786-787, 796-797: Boo animation 1
7A6-7A7, 7B6-7B7: Boo animation 2
7C0-7C1, 7D0-7D1, 7E0-7E1, 7F0-7F1: Note block
7CA-7CB, 7DA-7DB, 7EA-7EB, 7FA-7FB: Seaweed animation 1
7CC-7CD, 7DC-7DD: Muncher
7CE-7CF, 7DE-7DF, 7EE-7EF, 7FE-7FF: Seaweed animation 2
First Example for ExAnimation
We wanna animate the ?-block. How will we do it?
1. First of all, before animating anything, there is one important point to keep in mind: the destination tile for your ExAnimation tile in the ExAnimation window must be divided by 2 in hex, otherwise the destination will not be as expected. So for example, if your destination tile is EA, it should be divided by 2 in hex in a calculator, like your computer's built-in one or something else, to get 75. Put 75 instead in the destination tile text box.
For our example, the ?-block's final destination is at (60/2=)30. If we were to put 60 instead, the final destination would be at (60*2=)C0, which is not what we want.
2. For the ?-block you might expect the animation type to be 4 8x8s: line, but that is completely wrong! Since the frames are condensed in 8x8 tiles under the 8x8 Tile Editor window, it should be 2 8x8s: line instead. Refer to the ExAnimation tile explanation section for the ?-block and the 8x8 Tile Editor. The correct tiles to be input in the ExAnimation window are 780, 790, 7A0, and 7B0 and the type should be 2 8x8s: line.
Result!
Limitations
- Offset Change Mode is not supported, as that takes over layer 3
- Direct Color is unsupported
- Background tiles may only be 8 by 8 pixels or 16 by 16 pixels in Mode 0.[1]
- The horizontal resolution of Mode 0 is 256 dots.
See Also
| Other Background Modes | |||
|---|---|---|---|
| Mode 0 | Mode 1 | Mode 2 | Mode 3 |
| Mode 4 | Mode 5 | Mode 6 | Mode 7 |
Reference
- Appendix A-5 of the official Super Nintendo development manual


